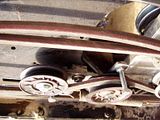
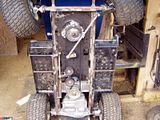
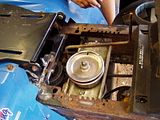
This is the in:censored:al setup of the belt and clutch system on the bottom from engine to jackshaft. Notice how I use a long cut belt and screw it together to get a good measurement on belt size keeps me from making several trips to the store.
Remember early in the build I has said we were doing this as acheap build using what we had. I built the clutch from spare pulleys and the mount bracket is made from 1x1/4 flat bar. Easy to do and got the job done.
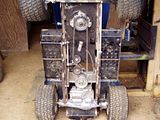
with everything in place we mounted the clutch pedal and made the linkage rod. I used the same material we make the tie rods on the EC axles.
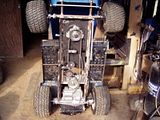
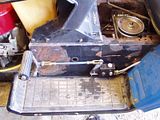
The drive line on bottom from motor to jackshaft is complete belt guides in place. The guides are 3/8 bolts with a flange nut welded to the frame on motor pulley. The jack shaft I drilled and taped the jackshaft plate and screwed them in.
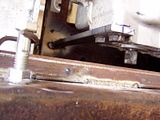
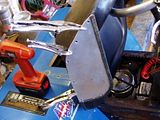
Here is a close up view of the front transaxle support braket. It bolts to the side of case and is welded on the other end to the frame. This keeps the transaxle from pivoting on acceleration.
Now the belt system on top of the jackshaft to the transaxle was very simple. It has no clutch so it doesn't need guides. for a tensioner I used a flat idler of the rear belt system of the original vary drive on the MTD. I welded a flat bar to the top of the frame and slotted it so the idler can slide to adjust tension. Also notice the tight confinement of the shifter.
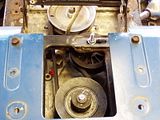
A real close look at the shifter. I used the origianl arm that bolts to the shifter cut it off to just a nub then using the original MTD shifter bent and shaped it and welded it to the end of the shift arm plate
This is an overall view of the completed shifter. An aluminum plate/cover will slip right under the shifter and bolt down to cover this open area.
Now the master cylinder is mounted to the side of the frame for easy access. using a steering column we heated and shaped the rod into the pedal you see in this photo. Welded a 1inch square tab to the rear for linkage mount. Jacob cut the splined end off and drilled it to a 3/8 hole and I welded it to the bottom and bolted it to the frame for a nice pedal setup. Easier than what I been doing on the other chassis builds. But as usual I am always trying something new.
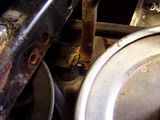
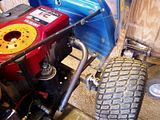
As you can see here the engine is a a 14.5 OHV. ARMA rules allow the use of the ohv in the super Stock Class. Also you can see the start of the exhaust inch pipe I.D. We wired the system up so it uses the original key swiitch and starter button to start it. It also suses the tehtered kill switch or key to stop it.
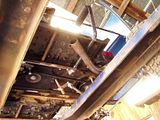
Here is the bottom or lower part of exhaust. We used the stepped of the exhaust off his kart motor to finish the exhaust. He wanted the mower worse than the kart.
One last thing to do before Jake can test it out and that is the seat side brace. Here you see how I do that. Useuing some old seat lace I put thaat on top of the aluminum to protect from any edges and clamp it to the side of seat drill 1/4 inch holes and Jacob bolted it on. Done time for testing.
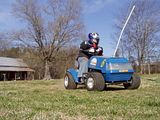
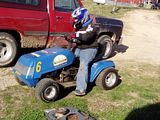
Jacob suited up with all the safety gear backing it out to the drive way before starting it.
His first pass at speed down our yard/back straight.
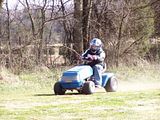
an upclose look at him coming off a turn onto what we call our front straight. We have a big yard.